Access your page's audience and track their journey.
Our latest CRM upgrade introduces a brand new Contacts section that is simpler to manage and more efficient. With personalized views, tailored filters, and column configurations, managing your contacts is now easier than ever. Take a closer look at how it works.
Contact Views
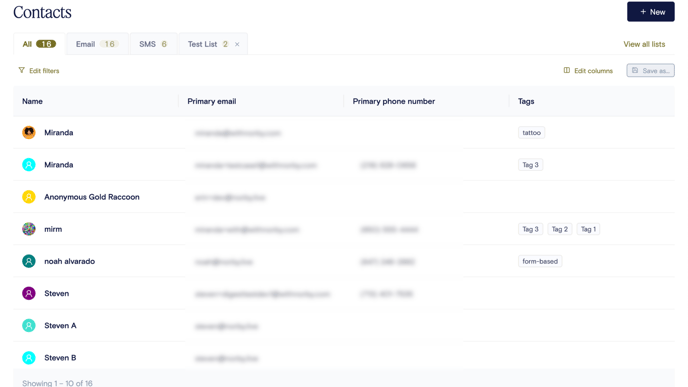
To view a list of your contacts in Norby, click on Contacts in the left-hand menu.
You can toggle between tabs to view contacts in several ways, including:
- All Contacts - view a list of all your contacts in Norby, regardless of the communication channel.
- Email Contacts - view a list of contacts who have shared their email addresses with you. The "Email Marketing" column shows a check mark for those who have opted-in to receive emails from you.
- SMS Contacts - view a list of contacts who have shared their phone numbers with you. The "SMS Marketing" column shows a check mark for those who have opted-in to receive SMS messages from you.
- Additional Saved Contact Lists - view custom filtered lists that you create to organize your contacts in a specific way. For example, you can create lists based on tags, events, or sign-up forms. These lists are saved separately from your main contact list and can be easily accessed whenever you need them.
Filtered Views
Use filters to segment your audience based on tags, events, sign-up forms, email or SMS engagement behavior, or individual contact information. Explore advanced list customization by mastering the use of filter groups. Dive into the help article here to enhance your ability to create complex and targeted lists.
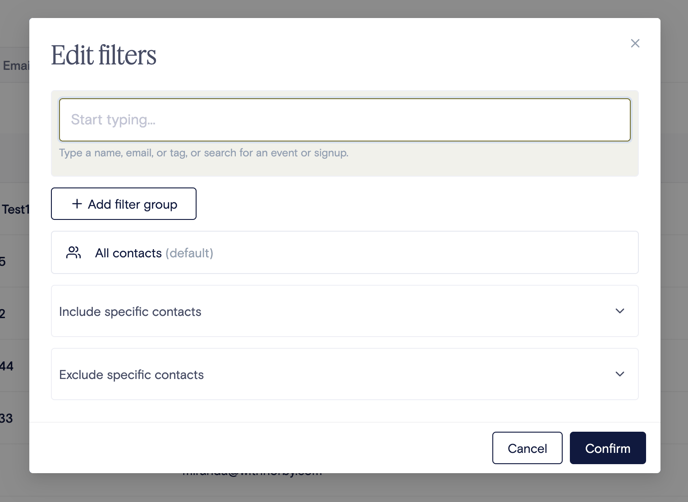
- Click on Edit Filters
- Click Add Filter Group
- In Search, type in the tag, event, sign-up form, email or SMS engagement behavior, or individual contact you want to filter by.
- If you don't type anything in, the list will default to displaying All Contacts.
- To exclude contacts, click the drop-down Exclude specific contacts and type in the contacts you wish to exclude.
- Click Confirm
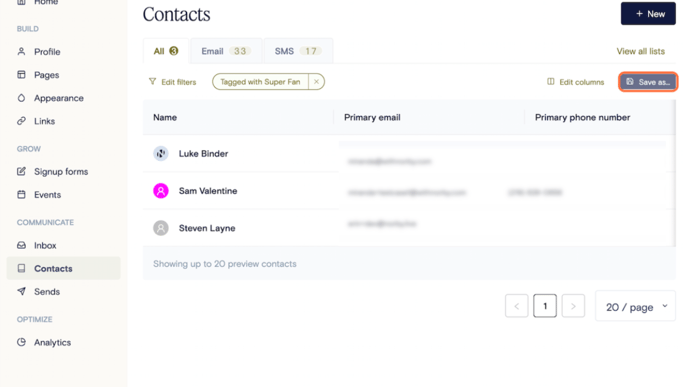
Saved Contact Lists
Generate unique contact lists from your filtered views.
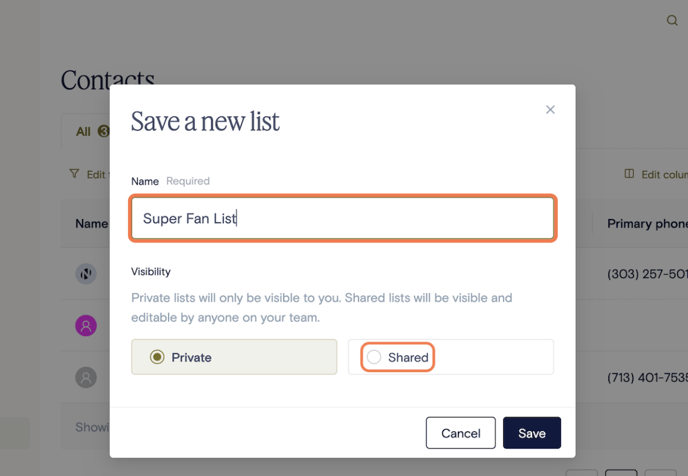
- From the new filtered view, click on Save as...
- Type in a Name for your list
- Select whether you want the list to be Private or Shared
- Private lists will only be visible to you
- Shared lists will be visible and editable by anyone on your team.
- Click Save
- Click View all lists to review the details of your Saved Contact Lists. This includes list size, last edited date, and who created the list.
- You can also delete Saved Contact Lists. Learn more about deleting contacts and contact lists in this help article.
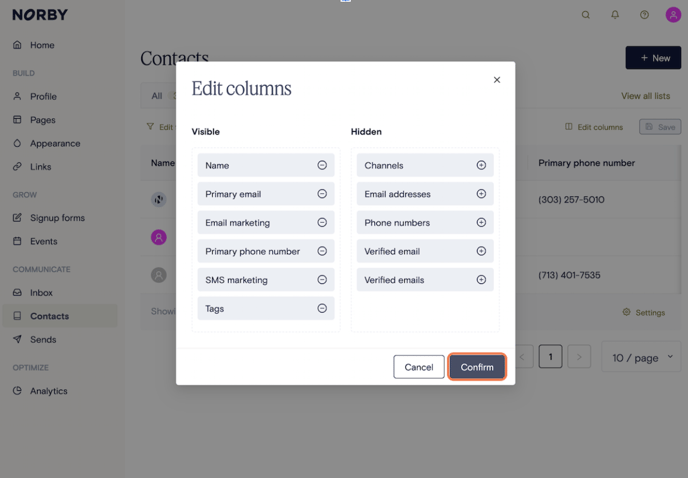
Customized Display Columns
To customize the information displayed in each Contact View, you can rearrange, hide, or make visible different columns. For instance, if you only want to view a contact's Name, Primary Email, and associated Tags, you can move those items to the Visible Columns section and hide everything else in the Hidden Column section.
- Click on Edit Columns
- Drag-and-drop column categories to the Visible or Hidden section
- Click Confirm to save your changes
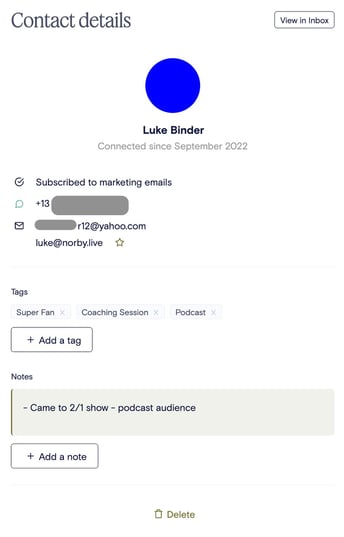
Individual Contact Cards
Contacts can hold the following information about your audience:
- Name
- Date contact created
- Email Marketing Opt-In Status
- SMS Marketing Opt-In Status
- Phone number(s)
- Email address(es)
- Tags
- Notes
To edit an individual contact, simply click on their name and a contact card will pop up.
- Hover over any field to edit contact information.
- For managing email marketing opt-in status, click on the toggle next to Subscribed to marketing emails
- Note: You can not edit opt-in status for SMS due to compliance regulations. Contacts must voluntarily opt-in via sign-up form. Contact support@withnorby.com for further assistance.
Importing Contacts
There are 2 ways to add contacts: Manually and Automatically.
Add Contacts Manually
You can add contacts manually in two ways by selecting New on the Contacts page:
- One-by-One --- Add a contact’s Name, Email, tags, and avatar.
- Upload a list as a CSV with Contact Names, Emails, Email Marketing opt-in status, and applicable Tags.
- If you are uploading Tags for your Contacts, ensure they are comma-separated in the same column.
- Click HERE to open a template we have drafted up for you. Avoid putting spaces after data in each column to ensure your upload is successful.
Automatic Contact Creation
There are a few cases in which Norby will automatically make a Contact from an audience member:
- Audience member submits Name, Email, and/or Phone number via a Signup block
- Audience member submits Name, Email, and/or Phone number via Event registration
- Audience member submits Phone number via SMS with keyword to your Norby phone number
- Audience member visits and engages with your site and becomes an Anonymous contact until they share other information via your Norby
Exporting Contacts
Quickly organize and export your saved contact lists for a customized view of your data—your way.
- Select the contact list you want to export. You can do this by clicking on the visible tabs or by clicking on View All Lists.
- Navigate to the bottom right of the page and click on Options.
- Select Export CSV.
- You will then receive a quick notification that your download is being prepared and will be sent to your email; see below:
Keep in mind
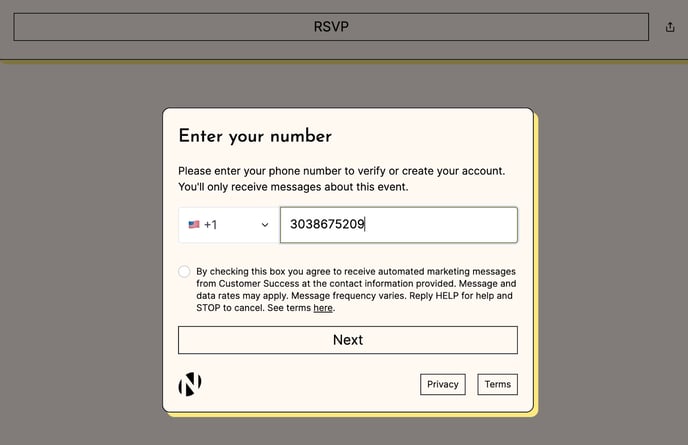
Once Contacts have opted to share their phone number and email, you can reach them one-on-one via the Norby Inbox. You can also search for the analytics history of any Contact by searching for them in the Inbox. However, a contact must be subscribed to email and/or sms marketing messages to receive mass communications via Norby Sends feature.
In the example below, when someone registers for an event they are signing up for the event but are choosing to not receive automated marketing messages from you. This means they will be able to receive notifications and reminders about the event but will not receive mass messaging sends sent via the Sends feature.